

Creating Drawing Ink from Natural Materials:
And embracing the imperfection of this unique art material

This month I’ve been getting my hands dirty (quite literally) with ink and reflecting on what it is I enjoy so much about this medium.
In my last post I shared painting techniques using ink, to add atmosphere to your art:

Now I want to share my ink-making experiments, working with natural, found materials and employing a trial and error process to create two types of ink, the first, using Elderberries, the second using Shaggy Inkcap Mushrooms.
Why I’ve decided to make inks
Over the past 5 years, my interest in the natural world has grown and nature and my creative practice have become more closely entwined. Recently, my curiosities have been extending outside my sketchbooks to more sustainable art practices, one of which is homemade inks.
In addition to being an eco-friendly art material, I find the alchemical process of ink-making appealing. It transforms something we typically overlook or discard into something useful and beautiful.
Making ink from natural materials helps me to connect with nature in a whole new way and allows me to understand it more deeply. It encourages me to take a slower, more thoughtful approach to my work, something I’m striving to do more and more.
Inherent in homemade ink is a distinct character that’s hard to compare with shop-bought alternatives. Each batch of ink is influenced by the time of year, the quality of the plants, and the method used. Endless variations in colours and tones can be achieved by combining natural materials and adjusting your processes, creating a range of inks tailored to your needs.
The process of ink-making is messy and not an exact science, but for me, that’s part of its charm. The unpredictability of natural ink forces you to embrace the art of imperfection, resulting in more expressive, one-of-a-kind paintings and drawings.
I encourage anyone curious about making art materials to give ink-making a go. You may just find that the ink you create with your hands adds a whole new dimension to your creative practice.

The Basics of ink making
I’ve been amazed to discover how many natural materials you can extract ink from. Here are just a few examples:
Food waste (for example avocado, onions, cabbage)
Nettles
Spices such as turmeric
Wood bark
The process of making ink is much the same as cooking down fruits for a syrup or preserve, you just don’t add the sugar. In its simplest form, it involves heating natural materials with water in a pan or pot and then straining the mixture so you’re left with a concentrated, refined liquid. The length of heating time varies depending on the item and the qualities you’re using so there’s no hard and fast rule, but from the tutorials I’ve seen, at least 30 minutes at a minimum. It’s advised to add a preservative to prevent mold growth, I used cloves but there are many options you can use.
If you want to thicken your ink, add Gum Arabic, a natural binder that thickens the ink and helps it adhere to paper.
I’m very new to ink-making so my process was basic and I made a LOT of mistakes. What I’m sharing here is my experience and suggested tips rather than a step-by-step process to follow.
There are advanced methods of ink-making, which involve extra processes and ingredients, and you’ll find lots of great books and online tutorials to help you explore the subject further.
Here are some I recommend:
http://www.tanyaval.com/alaskablog/inkmakingbasics
https://www.instagram.com/davidbegleyartist
https://www.instagram.com/unidola
Making Manuscripts using oak gall ink - British Library
My ink-making experiments
The inks I’ve made so far are from Elderberries and Shaggy Inkcap mushrooms. I was hoping to make oak gall ink (which produces black ink) but sadly I couldn’t find any oak galls*. Thankfully I came across the Shaggy Inkcap mushrooms which have made a good alternative for now.
*Edit: I found some oak galls on the day I was due to share this post! Not very many, and not enough to make ink, but it’s a start! Hopefully, I’ll get to make oak gall ink after all..
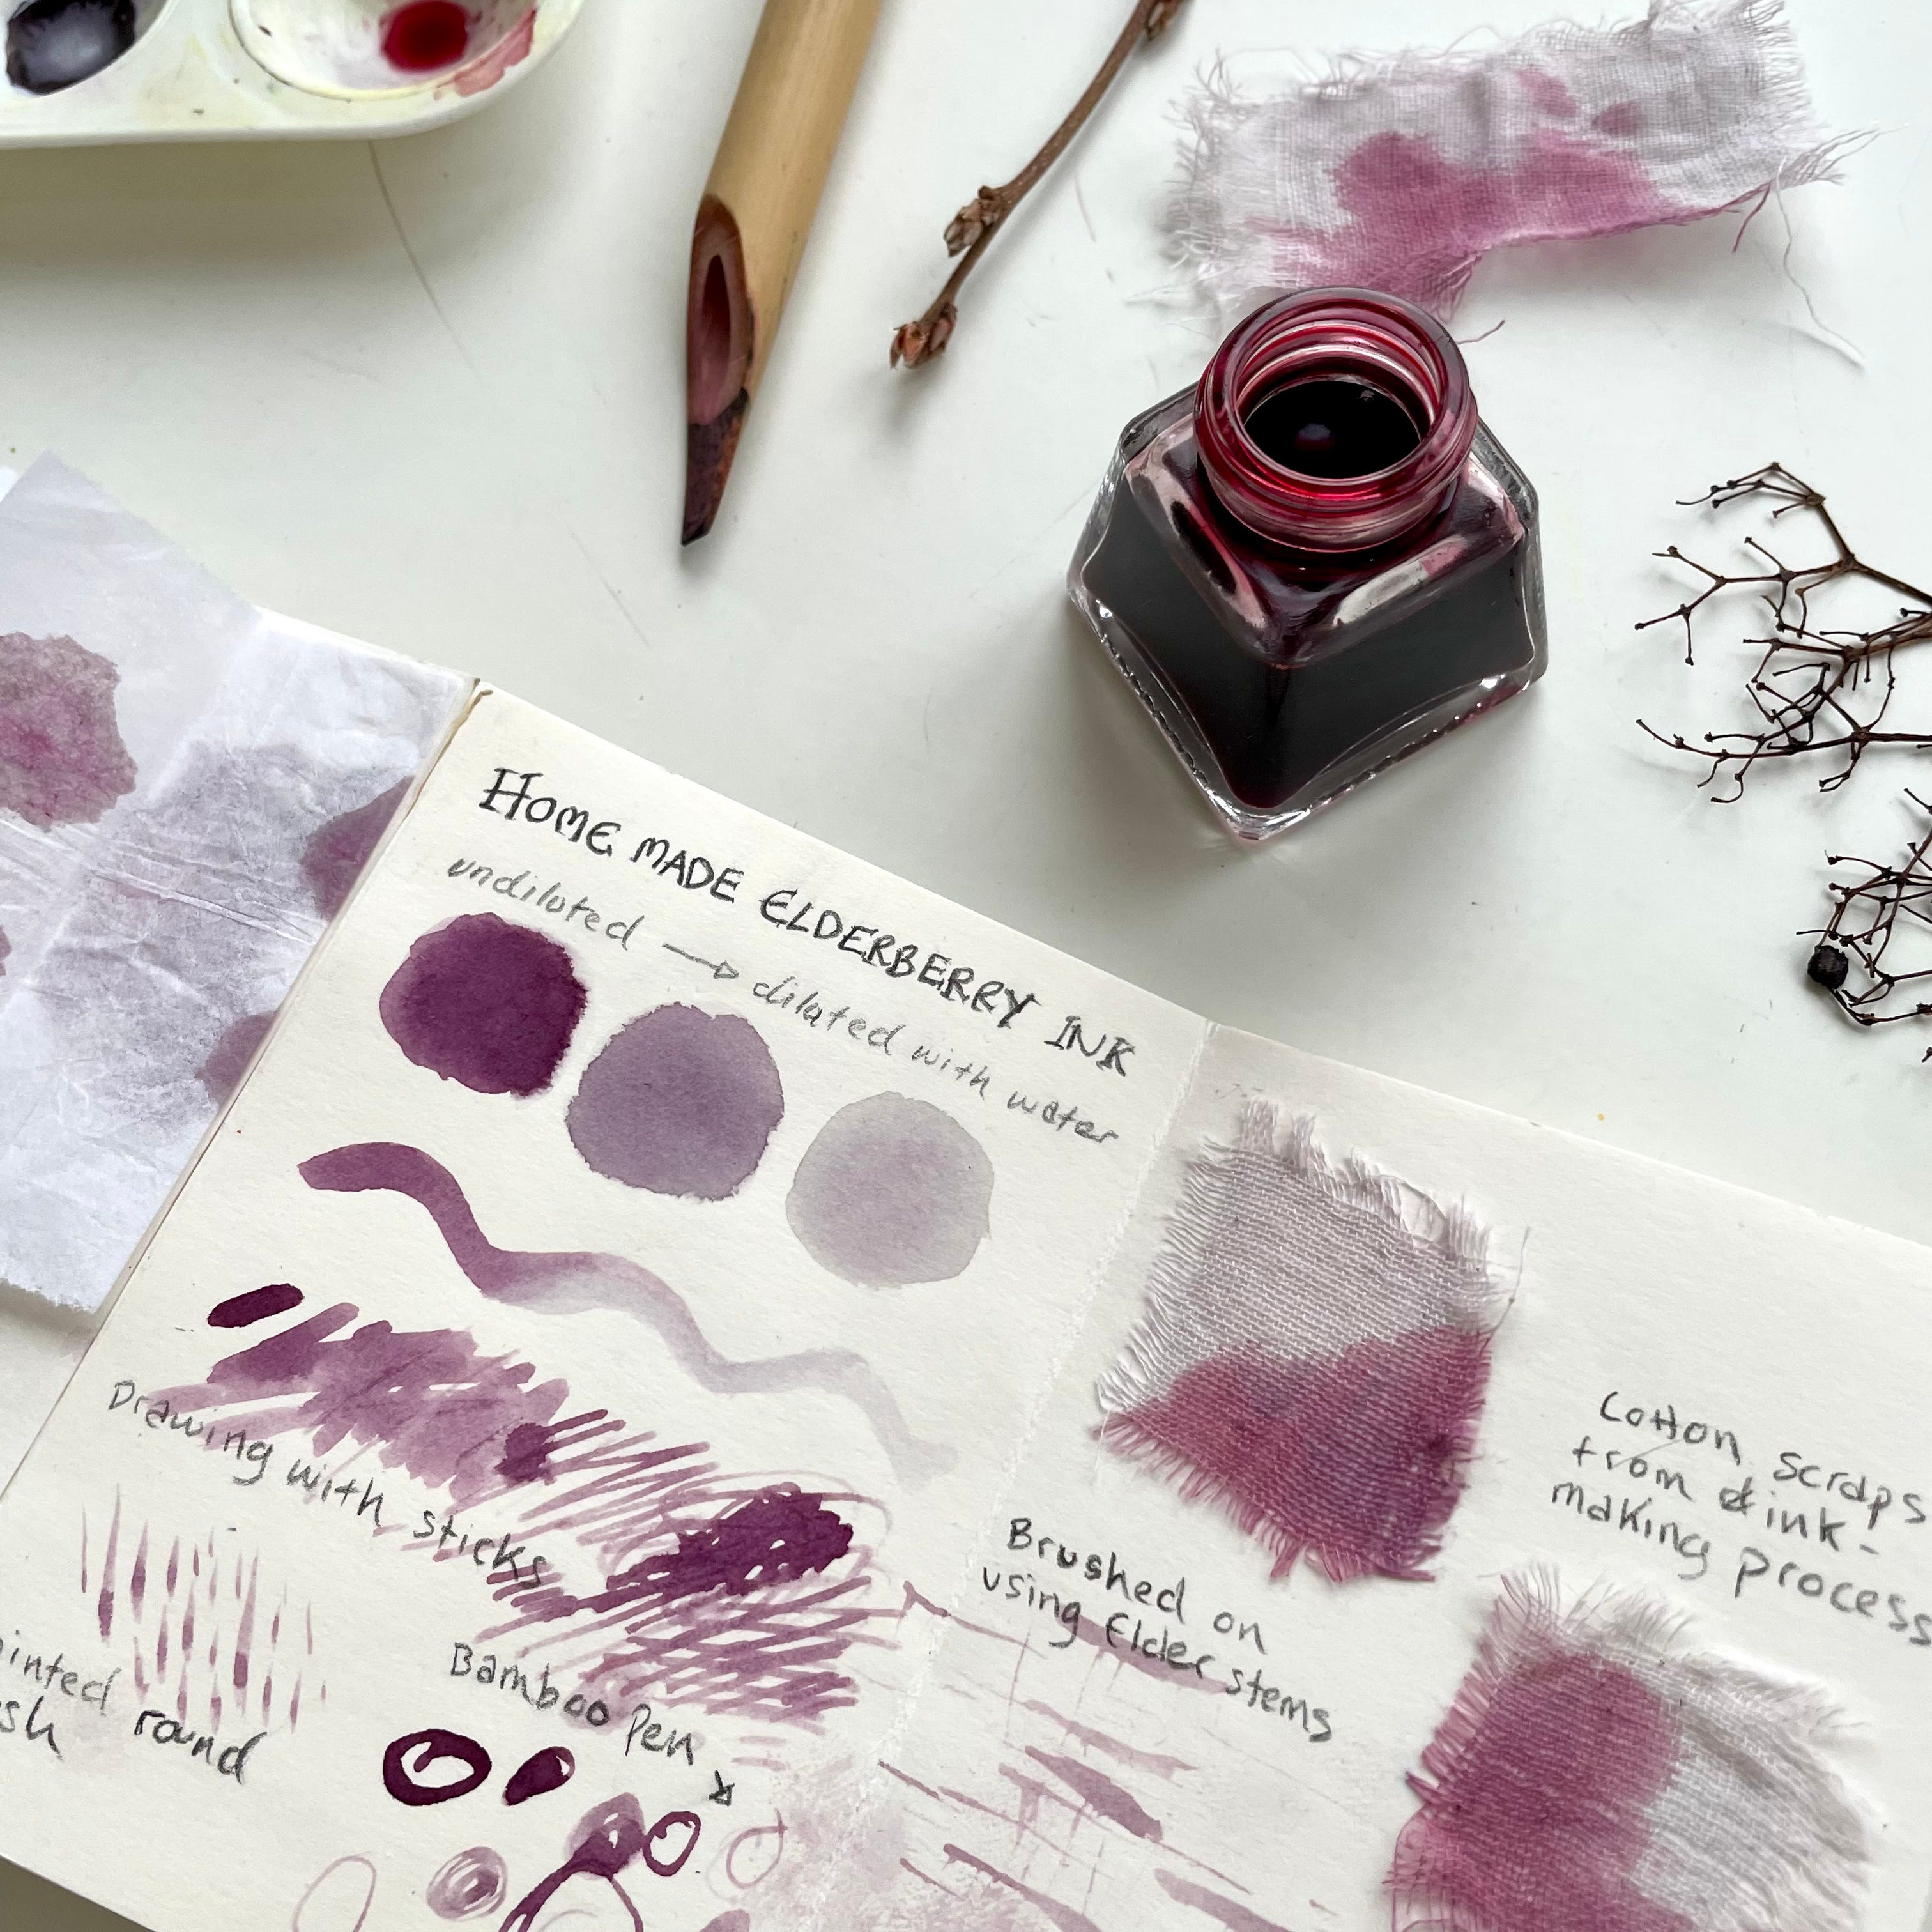
1. Elderberry ink:
This ink came about by accident after I’d collected some wild elderberries for making syrup and saw how much the berries stained my hands and kitchen towel.

The colour was so nice, that I wondered if I could use it as ink, so I kept some liquid aside during the syrup-making process and bottled it separately.
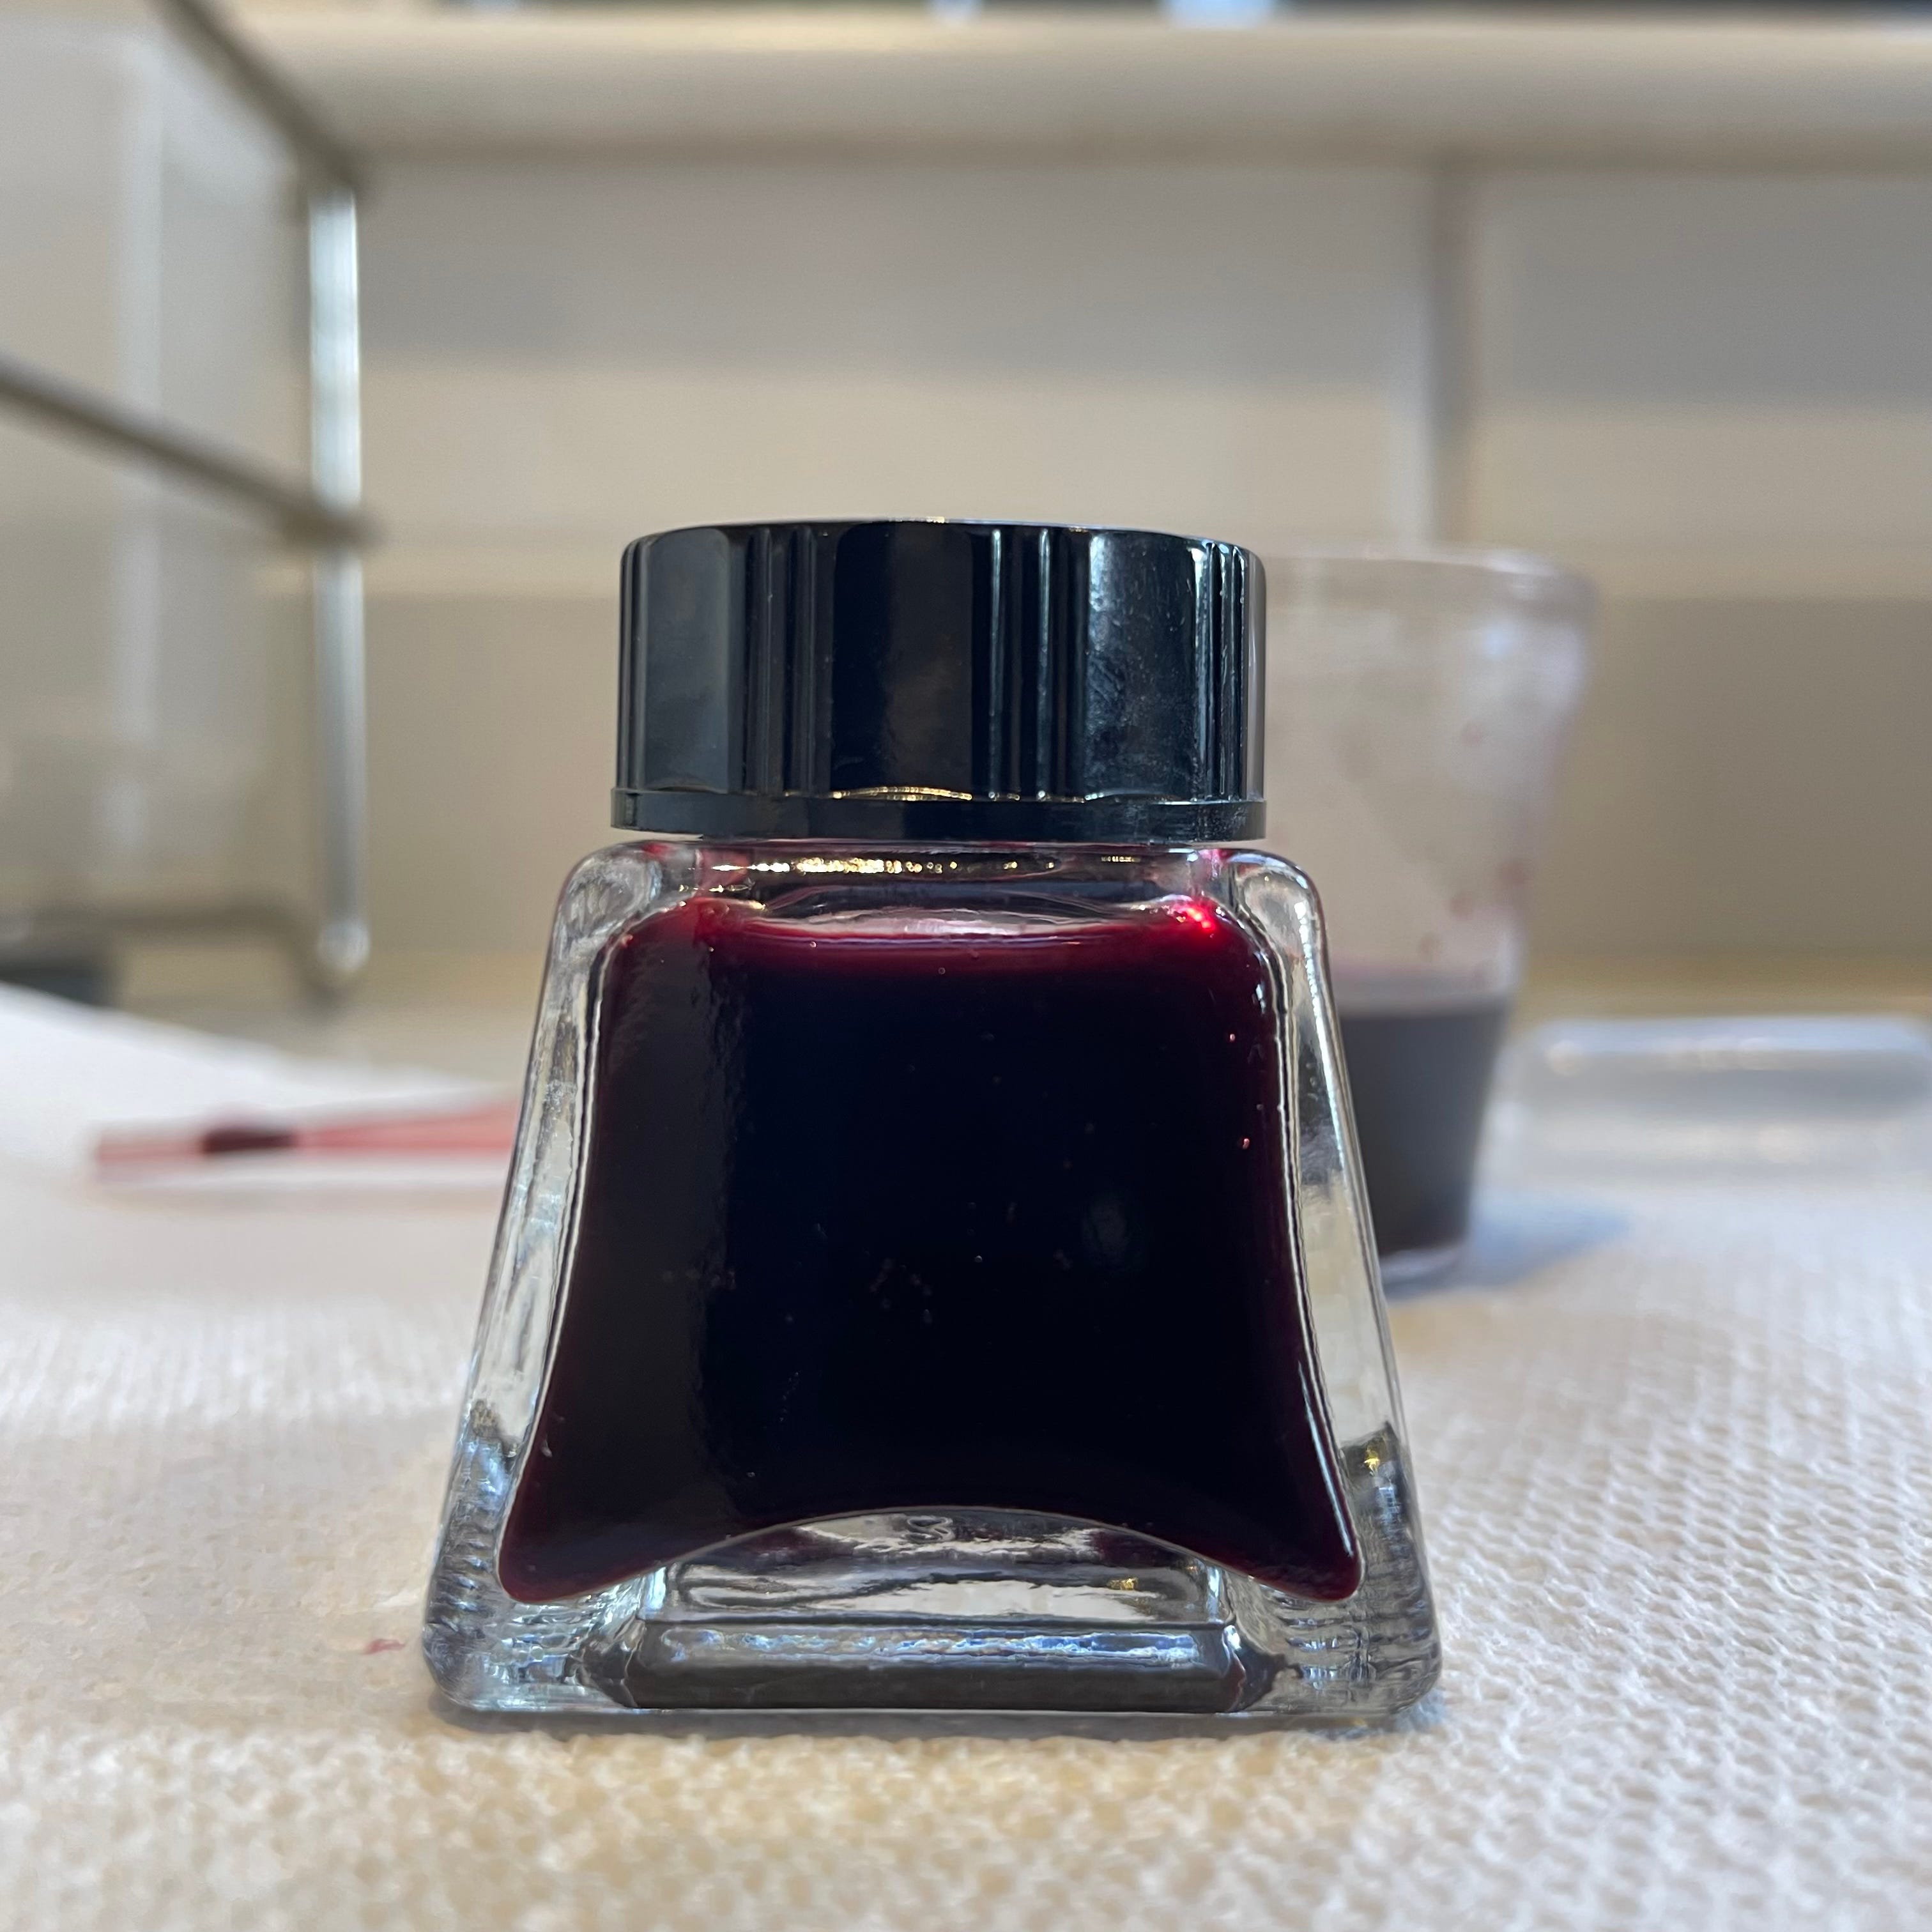
I didn’t add any binder such as gum arabic to my ink as I only had a small amount, and it was my first attempt, but I will experiment with this in the future.
Testing the ink
In the video below I share the testing of the Elderberry ink using different drawing and painting tools in my mini concertina sketchbook, which I made last month and had a few pages left to fill.
Take a look at this post to discover the origins of this sketchbook and tips on making your own.
Keep reading with a 7-day free trial
Subscribe to The Creative Flock to keep reading this post and get 7 days of free access to the full post archives.